How the Terracotta Warriors were Made
What Are the Terracotta Warriors Made of? – Yellow Earth
Experts have confirmed that the material used to mold the terracotta warriors and horses is a "yellow earth" sourced from around the burial sites. Yellow earth is easy to obtain, and was an appropriate material due to its adhesive quality and plasticity. The earth was screened and ground to remove impurities and to ensure it was fine and pure. A certain amount of white grit containing quartz sand, mica and feldspar was added. Adding grit to the earth strengthened its mechanical properties, which allowed the large figures to be easily shaped.![]() Read More: Were the Terracotta Warriors Made of Real Human Beings?
Read More: Were the Terracotta Warriors Made of Real Human Beings?
7 steps to make a terracotta warrior:
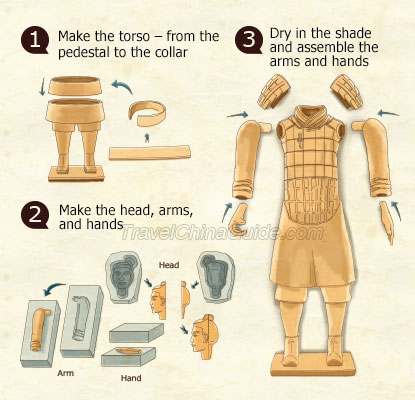
1. make the figure’s torso from the pedestal to the collar;
2. make the head, arms, and hands;
3. dry in the shade and assemble the arms and hands;
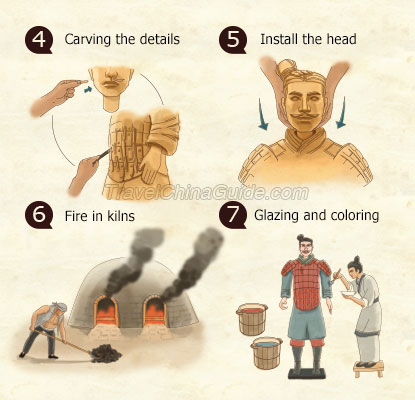
4. carve the body parts in detail;
5. install the head to complete a terracotta warrior;
6. fire the warrior in the kiln;
7. paint it with colored pigments.
How the Terracotta Warriors Were Made?
Make the Terracotta Warrior’s Torso from Pedestal to Collar
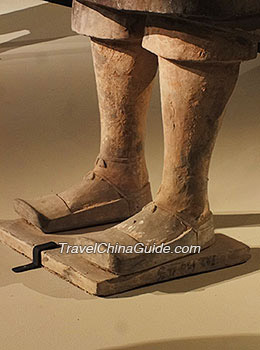
Artisans used mud to make a rough cast which was molded from bottom to top in sections. First they made the foot plate which was molded in a square pattern; the feet were the next, followed by the two legs and short pants. In order to represent muscle and bone to make the legs more lifelike, artisans would do some detailed sculpting. Short pants were made by carving a circle with a cord pattern above which were pasted prefabricated pieces of mud molded as pants. Next, the upper body was made by winding strips of clay upwards. In order to make the clay strips tight and strong, artisans would put sackcloth inside as underlay. This was pounded from the outside until they got a satisfactory shape and size.
Make the Arms and Hands and Attach to Torso
Straight arms were molded in corresponding molds. Bent arms were made in separate pieces, divided at the elbow, and then glued together. Hands were molded in the same way as straight arms. After being dried in the shade, artisans attached the hollow arms to the torso and then the warrior's hands were inserted and pasted onto the arms.
|
|
Make the Terracotta Warrior’s Head
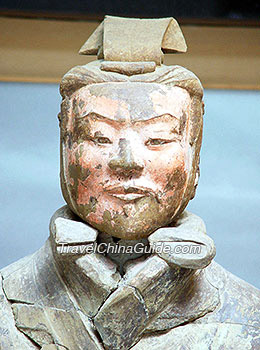
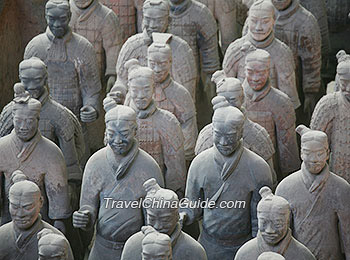
The shaping of the head is generally acknowledged to be the most difficult, and the procedure was very complicated. First, artisans molded the front and back sides of the head roughly, glued them together, and then applied several layers of mud to get different facial shapes. By kneading, carving, scraping and pasting, artisans successively constructed eyebrows, eyes, noses, mouths, ears, hair buns and hat decorations for the heads of terracotta warriors. They drew each figure with a distinctive face, and experts have confirmed that these facial features were reproductions of individual Qin warriors.
|
|
Carve the Details & Attach the Head
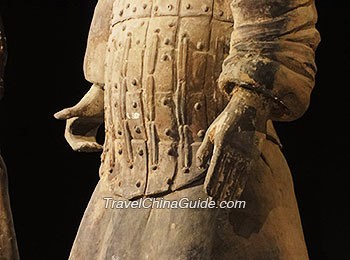
It is clear that the terracotta warriors are lifelike and vivid, and the reason is that the technical artisans did careful carving work to the molded body parts. They carved the legs, the arms, the feet in detail. Even the warriors’ armor were carved to exactly replicate the shape of the real ones. Attaching the head to the warrior’s body was the last step to integrate a complete terracotta warrior.
Firing in Kilns
The figures of the terracotta warriors were fired in kilns. For even heating, the Qin artisans left small holes in appropriate places on the figure. For example, in the terracotta figure's neck, there were holes through which flames could evenly enter the figure's body cavity. During the firing, artisans paid special attention to the degree of heating which was maintained at around 1,000 C (1,830 F). Moreover, experts did many experiments and found that the figures were placed in the kiln upside down during firing. This was because the upper part of the figure was heavier than the lower part. It was more stable to put the figures in this way, which shows that Chinese workers had mastered the concept of center-of-gravity as early as two thousand years ago.
Glazing and Coloring
The Qin terracotta warriors we see today are steel gray without fresh colors. But archaeological investigations have found that this was not the original color of that mighty force. In April of 1999, excavators astonishingly unearthed six kneeling armored warriors whose bodies retained large sections of colorful painting, which demonstrated that the Qin artisans had elaborately painted the terracotta warriors after firing, to make this majestic army more lifelike.
How the Terracotta Horses Were Made?
Recommended Tour Itinerary:
More Xi'an Tours
